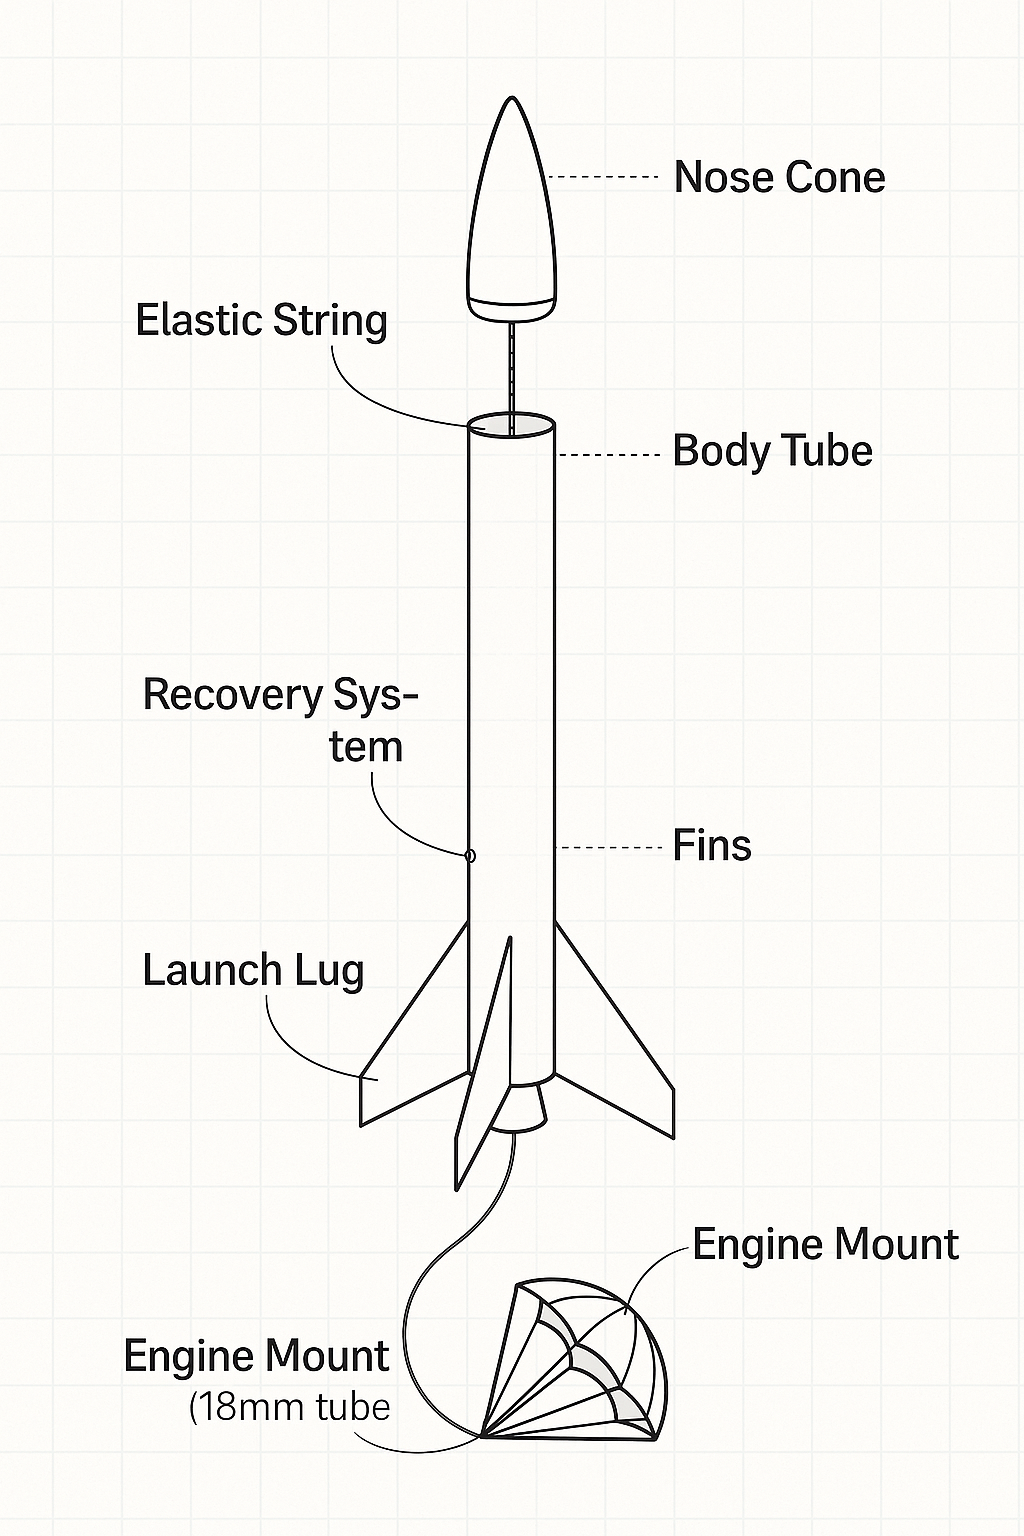
DIY Model Rocket Build (Using a Store-Bought Engine like C6-5)
Great! Building your own model rocket (excluding the engine) is a fun and educational project. Here's a complete guide to help you design and build a basic, Estes-style model rocket.
🚀 DIY Model Rocket Build (Using a Store-Bought Engine like C6-5)
🧰 Materials You'll Need:
| Part | Material | Notes |
|---|---|---|
| Body Tube | Cardboard (like mailing tubes or BT-50 equivalent) | ~9–12" long |
| Nose Cone | Plastic or carved balsa | Should fit snugly in the tube |
| Fins | Balsa wood or thin plastic/cardboard | 3 or 4 fins, same size |
| Engine Mount | 18mm tube for C6-5 | Can buy or roll your own |
| Launch Lug | Small straw or launch lug tube | ~2" long |
| Shock Cord | Elastic string | 12–18" long |
| Recovery System | Plastic parachute or streamer | Parachute: 12–15" diameter |
| Glue | White glue or epoxy | Use superglue for small parts |
| Paint | Spray paint or acrylic | Optional but fun! |
🛠️ Step-by-Step Instructions:
1. Build the Engine Mount
-
Cut a short cardboard tube (~2.75" for a C6-5).
-
Attach a thrust ring (e.g., a small cardboard ring) near the top inside so the engine stops at the right point.
-
Add centering rings so it fits snugly into your body tube.
-
Glue in place at the bottom end of the rocket.
2. Attach Fins
-
Cut 3 or 4 fins from balsa wood.
-
Sand them to an airfoil shape for better aerodynamics.
-
Mark even positions on the lower part of the body tube and glue them securely.
-
Let dry fully.
3. Install the Launch Lug
-
Glue a small straw or purpose-made launch lug tube parallel to the body tube.
-
Make sure it’s straight—this guides the rocket up the launch rod.
4. Attach the Nose Cone and Shock Cord
-
Connect the shock cord to the inside of the body tube (with a paper mount or glue tab).
-
Tie the other end to the nose cone.
-
Attach the parachute or streamer to the shock cord.
5. Final Assembly
-
Make sure all parts are secure.
-
Insert the engine only when ready to launch.
-
Add wadding (to protect the parachute).
-
Insert the parachute, then the nose cone.
6. Paint and Decorate (Optional)
-
Use light coats of spray paint.
-
Add decals or designs.
🚀 Launch Checklist
| Item | Confirm |
|---|---|
| Installed engine (e.g., C6-5) | |
| Igniter in place | |
| Recovery wadding inserted | |
| Parachute packed properly | |
| Nose cone fits snugly | |
| Rocket on stable launch pad with guide rod | |
| Safe distance observed | |
| Everyone clear for launch |
🎯 Tips for Better Flights:
-
Keep the rocket’s center of gravity (CG) ahead of its center of pressure (CP) — this ensures stable flight.
-
Sand fins smooth and align them carefully.
-
Always test in a safe, open area (e.g., field).
-
Follow NAR Safety Code.
Would you like a diagram, template for the fins/nose, or help designing a unique rocket shape?
